
Working with Surface Mount Devices (SMD’s)
Welcome to my page of hints and tips on how to work with SMD’s.
I have worked with surface-mount devices for over 20 years, and I am trained to work to IPC Class 3.
This page is designed to make it easier for you to work with these devices.
Although they are small, they can be worked on quite easily with the right tools.
Equipment needed:
- Soldering iron
- Flux
- Fine tipped tweezers
- Dental pick
- Magnification
- Solder
- De-soldering braid
Soldering irons come in all shapes and sizes. I use a JBC iron, which is by far the best I have ever used. I have tried several so-called “good” makes, including Metcal, which I found to be almost useless.
Below you can see a JBC iron:
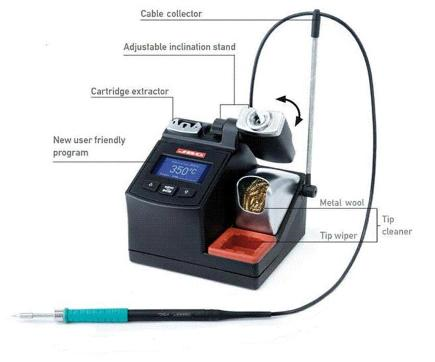
It is like using a pen, and makes life so much easier. The tip heats up to 400C in about 4 seconds, and keeps its’ heat, even when soldering to a big ground plane. If you plan to drag-solder an IC, this will help.
You buy a station, handle, and tips, so make sure you get it all! I find the 0.6mm tip is the most useful.
They are not cheap, but if you plan to use SMD’s frequently, then these irons will make a huge difference.
Search the web for JBC.
Flux is also essential, and I prefer the liquid form, which can be messy, but works extremely well.
Fine-tipped tweezers are a must, and are available from many places. If you visit the Ham Radio event in Friedrichshafen, there are usually many stands selling medical tools, including suitable tweezers.
Dental picks are also available from the Ham Radio event, but you could try asking your own dentist if he has any he no longer needs. They do wear out, and are often replaced. He may be happy to pass one on to you.
Magnification of some sort is a must. You will be better off if you can find a long-arm stereo microscope, but you could get away with one of those magnifiers with a built in light.
For preference, you will need a magnification of at least 4X.
Other items that you will find useful are a good flux cleaner, such as Isopropyl alcohol. If you have purchased the flux from a vendor, check out their cleaning aids too.
Surface mount devices that you will come across include capacitors, resistors, IC’s of various formats, and transistor-type devices.
To give you an idea of the various sizes of resistors, here is a table showing dimensions:
<
| Chip Size (mm) | Body L | Body W | Height | Size (Thousandths/Inch) |
|---|---|---|---|---|
| 0201 | 0.60 | 0.30 | 0.25 | 20thou / 10thou |
| 0402 | 1.00 | 0.50 | 0.25 | 40thou / 20thou |
| 0603 | 1.60 | 0.80 | 0.30 | 60thou / 30thou |
| 0805 | 2.00 | 1.25 | 0.30 | 80thou / 50thou |
| 1206 | 3.20 | 1.60 | 0.40 | 120thou / 60thou |
| 1210 | 3.20 | 2.60 | 0.40 | etc |
| 1217 | 3.00 | 4.20 | 0.80 | |
| 2010 | 5.00 | 2.60 | 0.40 | |
| 2020 | 5.08 | 5.08 | 0.80 | |
| 2045 | 5.00 | 11.5 | 0.80 | |
| 2512 | 6.30 | 3.10 | 0.50 |
Capacitors are generally classed in the same sizes.
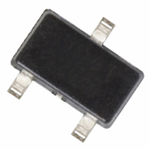
Transistor packages include SOT23 style, and SOT89 style.
| SOT23 | SOT89 | |
 |
 |
|
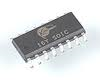
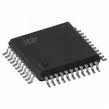
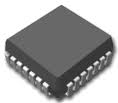
| ICs include these | ||
| SO16 | QFP | J-leaded |
 |
 |
 |
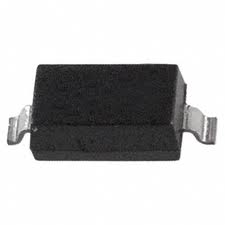
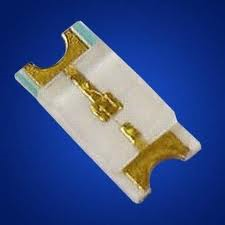
| Others include: | ||
| Diode | LED | |
 |
 |
Techniques:
Soldering resistors and capacitors is easy, and does NOT require additional tools. Simply tin one pad lightly, solder one end to that, and using tweezers, then solder the other end. There is no need to hold the part in place with complicated gizmos.
Soldering IC’s with wide-spaced legs requires you to solder them one at a time. You can’t easily drag-solder when the legs are too far apart.
To make it easier, place the IC on the pads, and then simply touch the soldering iron to a few legs on each side. There will usually be enough solder on the IC legs to hold it in place. If necessary, tin a few pads before placing the IC.
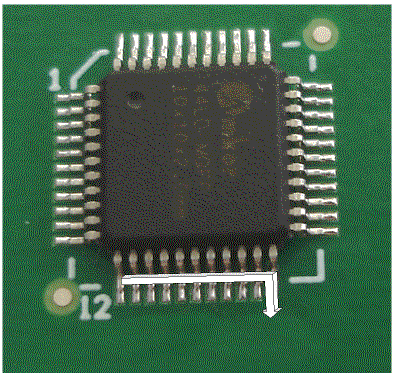
Soldering QFP’s is much the same, but if they lend themselves to drag-soldering, make sure you have all the legs placed centrally on the pads. If they are not perfectly lined up, you will end up with bridges.
Drag-soldering is a knack, and not difficult to learn.
You need perfectly lined up legs, meaning placed centrally on the pads, plenty of flux, and a soldering-iron tip that will bridge two legs. Place the tip at a shallow angle along the legs, wait for it to heat up nicely, and then place a small amount of solder on the tip. This should bridge the two legs. Now drag back slowly, and you will see the solder ball follow the tip. If you need, add some more solder as you go. When you get to the end of the legs, drag the iron away in the direction of the legs (ie at 90° – see below).
Removing QFP’s can be easy too. This is where the tin foil and the hot-air paint-stripper come in useful!
Use the tin foil to cover any plastic parts, making sure not to wrap the foil tightly, and then use the paint-stripper to apply heat. It won’t take long for the solder to melt, and the QFP will come away easily.
This is where a meter with a thermocouple can come in handy!
Place the tip of the thermocouple close to the part you wish to remove, and heat up the item to somewhere between 200°C and 205°C (assuming it is leaded solder).
If it is un-leaded solder, you might need to go as high as 250°C before it will let go.
In either case, it should come off easily. DO NOT attempt to pull it off, as this will result in lifted pads.
If the PCB has a big ground-plane on the underside, I find it useful to put in the oven. Place it in the oven, and set the temperature to 170°C to 180°C. Wait till the temperature indicator goes off, and CAREFULLY remove the board.
Place it on a heat-proof surface, and then try using the heat gun again.
Once the IC, or any device, has been removed, use the braid CAREFULLY to remove any remaining solder.
I use a cut-down paintbrush to apply Isopropyl Alcohol to the area, which thoroughly cleans the pads ready for replacing the device.
Using tin-foil (aluminium foil) to protect plastic parts is very useful, and one I use at work. If the plastic parts are surface mount types, they are probably designed to withstand temperatures of around 240°C, but through-hole parts are not, and will need to be protected from heat.
A few loose layers of tin-foil are enough to prevent them from melting, but do make sure they are loose, and not tightly wrapped around the part.
Any comments or suggestion, please send to
phil (at) gu0sup (dot) com